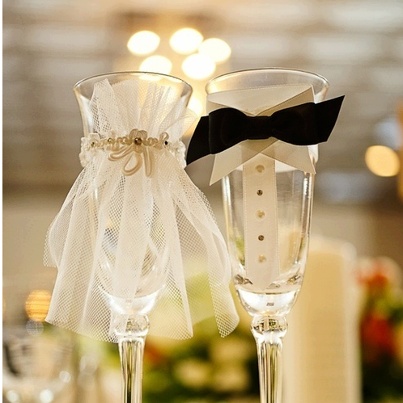
If you’ve seen the personalized or special champagne flutes made for brides and grooms, you know they’re not exactly cheap. However, you can make an adorable version for just a few cents more than the cost of the flutes themselves. Here’s how to create these super cute DIY hubby and wife champagne flutes for toasts.

For the Bride
Start by cutting a rectangle of white tulle that will be the “dress” of the flute. Next, pick some white lace or trim and measure around the champagne flute. Cut the trim or lace to fit. Using a hot glue gun, go ahead and glue the tulle to the lace a little at a time, about ½ an inch from the top of the tulle. You’ll want to bunch the tulle up as you go so you create “ruffles.”
The width of the tulle should be about 1 and ½ inches after you’ve glued it. Next, you can glue one end of the lace to the champagne flute with a little dot of glue and bring the other end around to meet it, gluing that one as well. Finish up by gluing rhinestones or bead embellishments around the lace.
For the Groom
Measure around the flute with a piece of white grosgrain ribbon and cut the ribbon to fit. Go ahead and glue the ribbon to the flute, as this will be your foundation to work with. Next, cut two pieces of ribbon about 2 inches long. Using a lighter or candle, quickly hold the edges of the ribbon to the flame to seal them. Then, cross one piece over the other and glue them together. Now glue them to the white ribbon on the glass, at the point where the ribbon meets. Cut another piece of white ribbon about 3 or 4 inches long and cut one end into an arrow. Seal the edges with the flame. Glue this vertically to the top of your white “x,” as this will serve as the tuxedo shirt.
Now you will want to make a bow out of black ribbon and glue it to the top of the white ribbon, where the “x” meets. Finish the shirt by placing rhinestones down the vertical white ribbon to act as the tuxedo shirt buttons. Voila – you’ve created a beautiful set of wedding champagne flutes!


